


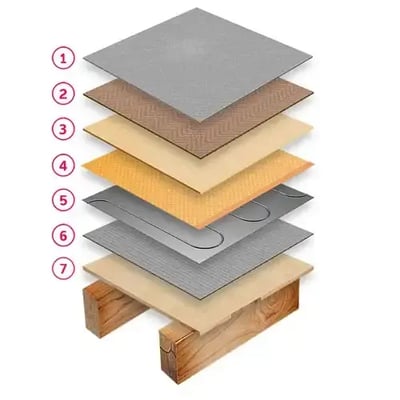
1. Substrate preparation
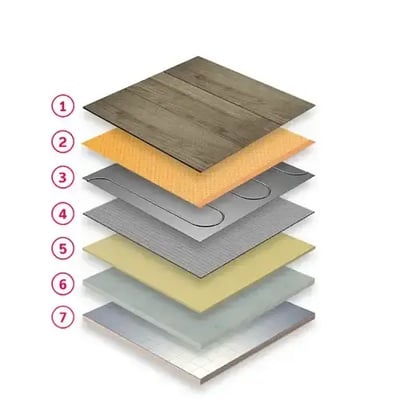
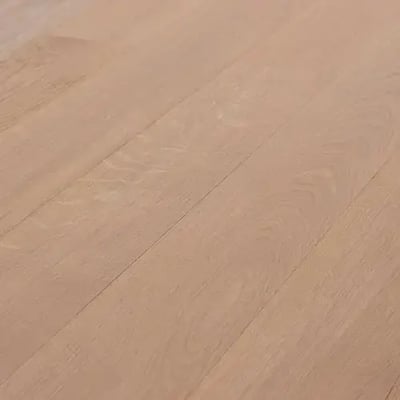
Engineered timber floor finish
1. Engineered timber
2. Cushioning overlay
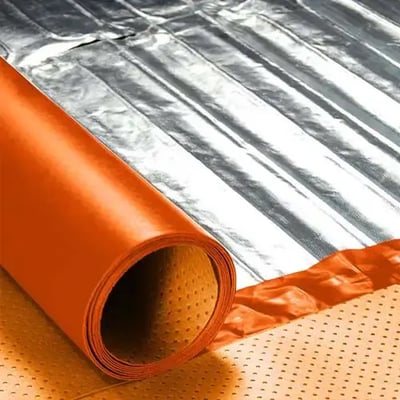
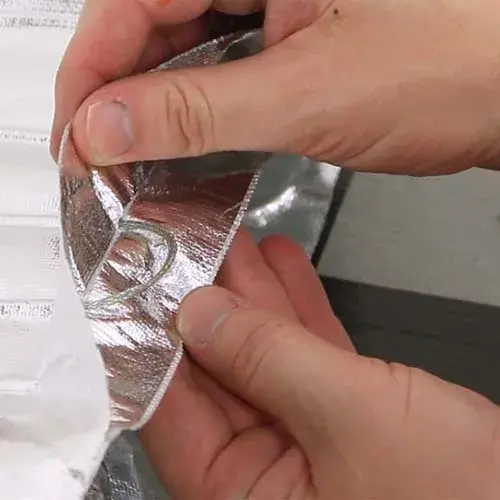
3. Foil
4. Cushioning underlay
5. Uncoated insulation board
6. Concrete substrate
7. Substrate insulation
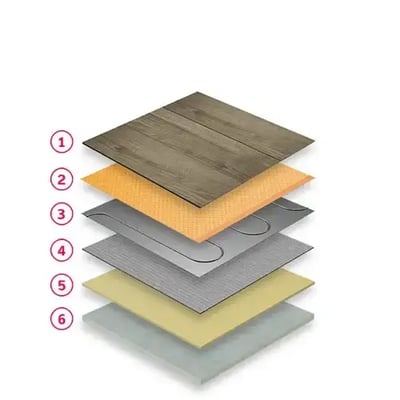
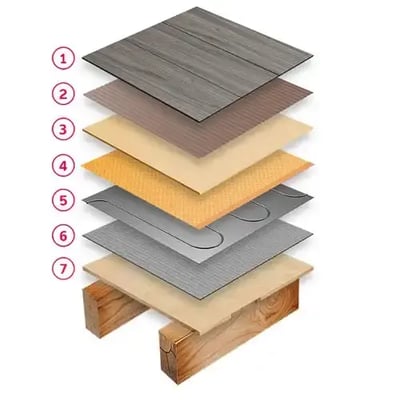
Engineered timber floor finish
1. Engineered timber
2. Cushioning overlay
3. Foil
4. Cushioning underlay
5. Uncoated insulation board
6. Concrete substrate
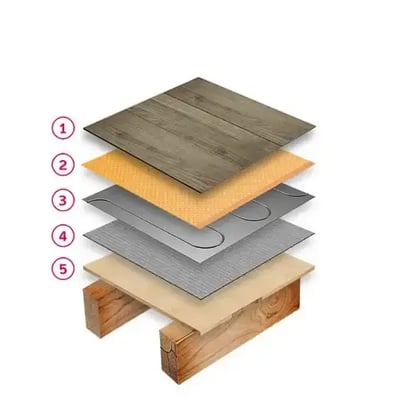
Engineered timber floor finish
1. Engineered timber
2. Cushioning overlay
3. Foil
4. Cushioning underlay
5. Timber substrate
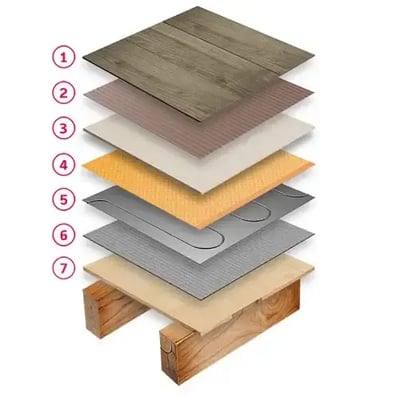
Bonded timber floor finish
1. Bonded timber
2. Acrylic adhesive
3. Cement board overlay
4. Cushioning overlay
5. Foil
6. Cushioning underlay
7. Timber substrate
Carpet floor finish
1. Carpet
2. Carpet underlay
3. HDF overlay
4. Cushioning overlay
5. Foil
6. Cushioning underlay
7. Timber substrate
Vinyl tiles floor finish
1. Vinyl tiles
2. Acrylic adhesive
3. HDF overlay
4. Cushioning overlay
5. Foil
6. Cushioning underlay
7. Timber substrate
2. Testing
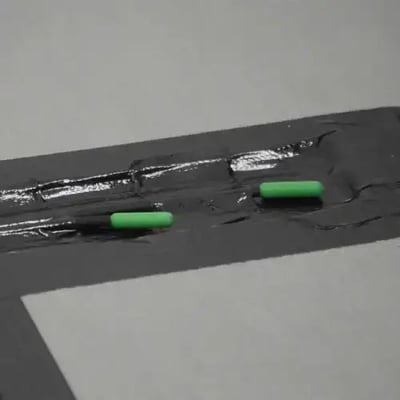
3. Installing floor sensors
4. Installing Foil
5. Install cushioning overlay
6. Floor finish over Foil
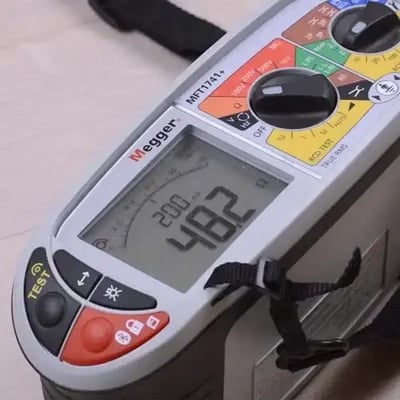
7. Final testing
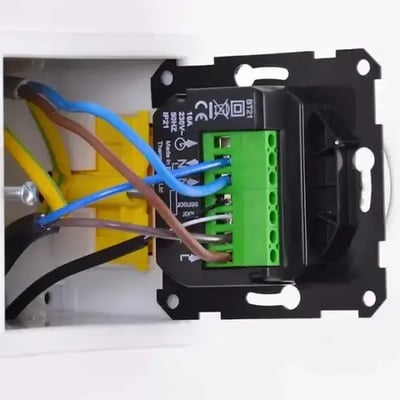
8. Wiring connections

9. Commissioning underfloor heating
Get an electric underfloor heating quote
Complete the short form and you'll receive a fast quote turnaround time along with the right product details for your property or project.
Need it even quicker? Call our HQ and one of the team will be happy to help on 0800 019 5899.

Made with you in mind
ThermoSphere Foil is the only one of its type to include a continuous earth braid and the first fully earthed foil in the UK to feature accessible cable loops making installation a breeze. The double layer of foil is specifically designed to protect the heating element and achieve an even spread of heat to the floor above.
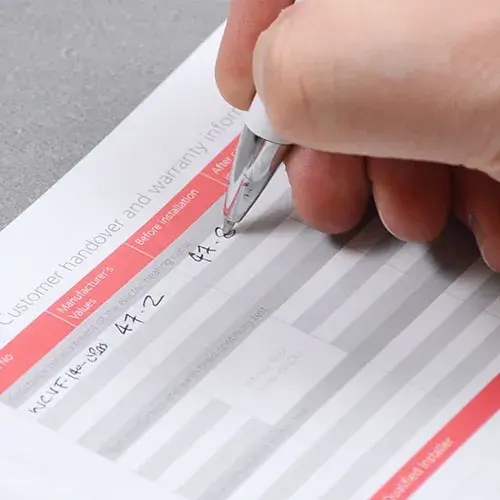
Lifetime warranty
As with ThermoSphere Mesh and ThermoSphere Membrane systems, in the unlikelihood that you do experience a problem with ThermoSphere Foil, don't worry, you can relax knowing that each installation is covered by a lifetime warranty. All you need to do is register the warranty within 60 days of the installation date.

Spare floor sensor
Always install the floor temperature sensor in a conduit to facilitate replacement should it be required. If you don't want to use a conduit, install a second floor sensor as a spare.

Parallel installation
In bigger areas, 2 or more foil heating can be connected to the thermostat in parallel, as long as the total combined load does not exceed 16 Amps.

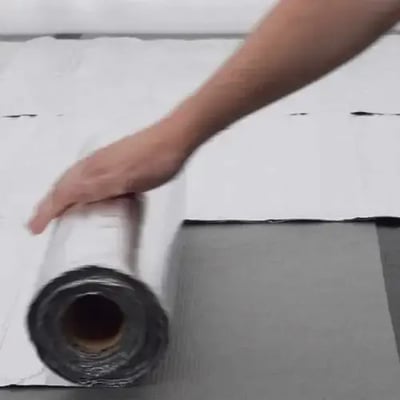
Floating Build-up
Tape floating layers of insulation and underlay boards together to prevent them moving while you install the rest of the layers on top.
